DIY Cold Therapy Plunge: The Ultimate Beginner’s Guide
- Active Aqua

- Apr 24
- 6 min read
Build a reliable, affordable cold therapy setup at home without wasting time or money.
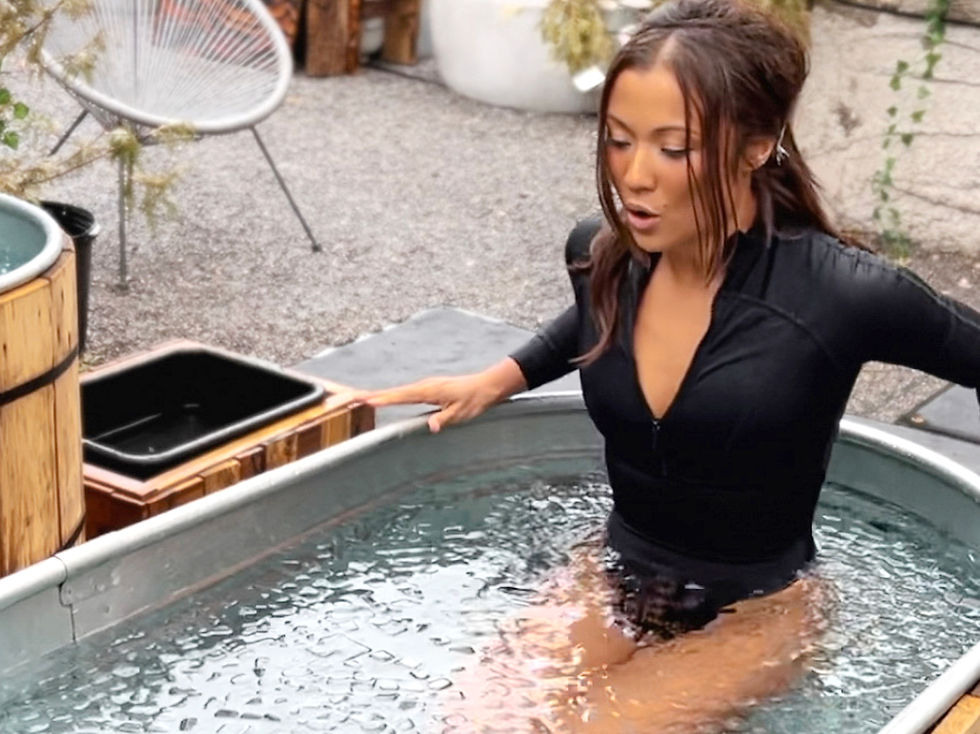
You’ve seen the cold plunge tubs all over your feed. You’ve heard the buzz: faster recovery, better sleep, boosted mood. But you’re not ready to drop five grand on a high-end setup.
Good news: you don’t have to. With a little know-how (and the right gear), you can build a cold plunge that’s reliable, affordable, and entirely your own.
From professional athletes to overworked tech founders, people are turning to cold water immersion for its wide-ranging physical and mental benefits. It’s a lifestyle, too, which means that a DIY solution can fit neatly into however you want to approach your own plunge in order to reap the significant physical and mental health benefits.
We’re talking reduced inflammation, faster muscle recovery, better sleep, enhanced mood, and greater mental clarity.
This guide will walk you through how to build your own cold bath system, step by step, with a focus on performance, safety, and long-term use.
Let’s get started.
Why Build a DIY Cold Therapy Plunge?
There are three core reasons people choose to build their own plunge system:
1. Cost Efficiency
A solid DIY cold plunge setup can be built for under $1,500, often closer to $1,000—less than a third of what you’d pay for most prebuilt options. Most of that cost goes toward the chiller, the machine that keeps the water cold.
2. Customization
You get to decide where your cold therapy bath lives—garage, basement, backyard—and how it’s configured. You can choose the size, materials, insulation, filtration, and more to match your goals and lifestyle.
3. Confidence and Control
When you build your system yourself, you understand how it works. That means easier maintenance, quicker troubleshooting, and less reliance on proprietary components or customer service lines.
Note: As with any new wellness routine, especially one involving intense cold exposure, consult with your health care provider before starting.
What You’ll Need: Core Components of a DIY Cold Therapy Plunge
Before we walk through the build process, let’s look at the parts you'll need to make it happen.
This is the heart of your system—the unit that cools and maintains your water temperature. Active Aqua chillers are a favorite among DIYers because of their reliability, affordability, and strong track record in hydroponics and cold plunge applications.
What to look for:
Cooling capacity (BTU rating)
Compatible pump flow rate (GPH)
Whether it’s saltwater & chlorine safe (if applicable)
Ease of setup and support
Designed originally for precision cooling in hydro systems, Active Aqua chillers are rugged, quiet, and field-tested by thousands of cold therapy DIYers. Available in 1/10 to 1 HP models, they cover everything from small tubs to pro-grade setups.
2. Tub or Tank
There’s no one-size-fits-all here. Popular options include:
Stock tanks (typically plastic or galvanized steel)
Chest freezers (modified with waterproofing and timers)
Repurposed bathtubs or spa tubs
Your decision should factor in space, comfort, and insulation.
3. Water Pump
To cool water effectively, you need to circulate it through the chiller. A small submersible pump (typically 250–500 GPH) will do the job. We like the Active Aqua water pumps that share positive performance reviews paired with the chillers. It must be compatible with your chiller’s specs.
4. Pre-Filtration System
Even in cold water, bacteria and organic matter can build up. Filters keep the water clean and reduce how often you need to drain and refill. You can go simple (sponge or foam filter) or add a UV sterilizer for advanced protection.
5. Accessories and Safety Equipment
Waterproof thermometer
Timer or smart plug (for energy efficiency)
GFCI outlet or surge protector
Tub cover (to reduce evaporation and heat gain)
Optional: bromine or chlorine tablets if you're not using UV
Building Your Setup: A Step-by-Step Walkthrough
Here’s how to take the parts above and turn them into a reliable cold therapy plunge setup.
Setup time: 2–4 hours (not including shipping).
Step 1: Choose and Prepare Your Tub
Pick a container that’s large enough to fully submerge your body up to the shoulders, but compact enough for your space. Clean it thoroughly and inspect for leaks. If placing it outside, consider adding an insulation wrap or foam panels to improve thermal efficiency.
Step 2: Install the Pump and Chiller
Place the chiller on a stable, dry, ventilated surface near your tub.
Connect the outlet of your pump to the inlet of the chiller using ½-inch or ¾-inch tubing.
Then, connect the outlet of the chiller back into the tub.
Submerge the pump inside the tub and plug both units into a GFCI outlet.
Test the flow by turning on the pump. You should see water circulating through the chiller and back into the tub.
Step 3: Add Filtration and Monitor Water Quality
If you plan to reuse the water for more than a few days, install a filter between the pump and chiller or inside the tub. A UV sterilizer can be added in-line to kill bacteria and viruses.
Add a water thermometer and check daily. If using chemicals, test pH and chlorine/bromine levels weekly. If not, consider draining and refilling the tub every 5–7 days.
Step 4: Dial in Your Temperature
Set your chiller to your desired temp. Most beginners start around 55°F, gradually working down to 40–45°F over time.
Depending on your tub size and insulation, it may take 2–6 hours to reach temperature from ambient water. Consider using a smart plug or timer to reduce energy usage during off-hours.
Step 5: Run Safety Checks
Make sure the tub and electronics are on a level surface.
Use non-slip mats around the area to prevent injury.
Install a GFCI outlet if one isn’t already available.
Never plunge alone until you’re experienced and confident.
Using Your Cold Plunge Safely and Effectively
Cold water immersion can deliver profound benefits, but it should be approached intentionally.
Start with short durations: 1–2 minutes is more than enough at first. Work up gradually to 5–10 minutes.
Use breath control techniques: Slow, steady breathing can help override the body’s panic reflex and make the experience more manageable.
Monitor your response: Numbness, dizziness, or shivering are signals to exit the plunge. Always listen to your body.
Consistency over intensity: Regular, short plunges are more beneficial than occasional extremes.
Maintaining Your Cold Therapy Plunge
A great setup is only as good as its upkeep. Here’s how to keep yours clean and running well.
Weekly Tasks
Clean or replace filters
Check hose connections for leaks
Test water clarity and pH
Monthly
Drain and scrub the tub
Inspect electrical components
Check for mineral buildup on pump and chiller connections
Common Troubleshooting Issues
Problem | Likely Cause | Solution |
Water not cooling | Pump flow too low, or incorrect hookup | Verify connections and flow rate |
Cloudy or smelly water | Inadequate filtration or chemical imbalance | Add UV, change water, test pH |
Chiller noisy or not turning on | Air in lines or debris | Bleed air, clean intake, check for obstructions, check for error messages, review instructions |
FAQs
Can I run my chiller 24/7?
Yes, but using a timer or smart plug to cycle it can reduce energy use and wear.
Can I use saltwater?
Check your chiller specs. Active Aqua models are saltwater, chlorine, and bromine safe; others are not.
How often do I need to change the water?
With good filtration and basic chemical balance: every 1–2 weeks. Without: every 3–5 days.
Can I place this outdoors?
Check the model to confirm if approved for outdoor uses so you do not void the warranty. If your setup requires the chiller to be outdoors, protect the chiller from the elements. Use insulation, covers, and an enclosure if needed but never block air flow to the unit.
What chiller size should I choose?
This depends on your tub volume. For most DIY setups (100–150 gallons), a 1/4 or 1/2 HP Active Aqua chiller is sufficient. In warmer regions stepping up to a larger size may be needed. Confirm the water volume needed in your tank with you inside to determine the right size model for your setup.
Final Thoughts and Next Steps
Building your own cold plunge setup isn’t just a cost-saving hack—it’s a gateway to consistent, sustainable cold therapy on your own terms. With the right components, a bit of planning, and a focus on safety, you’ll be able to enjoy the same recovery and wellness benefits as the pros—without the four-figure price tag.
Looking to get started?
Explore the full line of Active Aqua chillers and find the perfect fit for your DIY cold plunge today.